Dealer On Boarding
Welcome to our Dealer Onboarding Section! This comprehensive collection of step-by-step guides and videos are designed to guide and support our dealers through every step of their onboarding process. Whether you’re a new dealer joining our network or an existing dealer looking to refresh your knowledge, this series is here to ensure a seamless and successful onboarding experience.
In these guides, we’ll cover a wide range of topics, including setting up your dealer account, navigating the dealer portal, accessing marketing materials, creating and order, and maximizing the benefits of our partnership. Our goal is to empower you with the knowledge and tools needed to effectively promote and sell our products and services.
Each guide is carefully crafted to provide clear instructions and valuable insights, ensuring that you have a solid foundation to confidently engage with your customers and drive your business forward. We understand the importance of a smooth onboarding process, and that’s why we’ve dedicated this series to help you make the most out of your dealership.
Join us on this exciting journey as we explore the key aspects of becoming a successful dealer. Whether you’re looking to expand your product portfolio, increase profitability, or enhance customer satisfaction, our Dealer Onboarding Series has got you covered.
So, sit back, relax, and get ready to unlock the full potential of your dealership. Let’s dive into the world of PrintFactory and embark on a rewarding partnership together.
Navigating the Dealer Portal
Log in to the Dealer Portal
When you sign up as a dealer with an account manager, we will create a dedicated account for you. Soon after, you will receive an email containing your login credentials. To access your account, simply visit https://app.printfactory.cloud/order/index and log in using the provided credentials.
And Customize your Home Screen
The next step is to customize your view to include the partner section. By doing so, you will have access to specific tools and resources tailored to dealers. Personalizing your dashboard allows you to optimize your experience and easily navigate through the partner-specific features.
NB: The “Partner” “Order” Menu is only visible to users who have been assigned the rights “Dealer – Order Products”
Main Overview
With this Main Overview, you have a centralized hub that empowers you to easily search, create orders, track customers, monitor expiring subscriptions, and manage licenses. It’s a one-stop solution designed to streamline your operations and enhance your overall efficiency.
At the top of the page, you have the convenient search bar, allowing you to quickly search for users, companies, order numbers, serial numbers, and invoices. Simply type in your query, and relevant results will be displayed instantly.
Moving on to the top left block, you’ll find the option to create a new order. We’ll delve into this in more detail later, as it’s a crucial part of the ordering process.
On the top right block, you’ll see a map showcasing all of your customers. This visual representation helps you gain insights into the geographic distribution of your customer base, enabling you to make informed decisions and effectively manage your operations.
Heading to the bottom left block, you’ll find a comprehensive report of your expiring subscriptions. This section serves as a valuable reminder to take timely action and ensure the continuity of your customers’ subscriptions.
In the bottom right block, you’ll find a report of your expiring licenses, which includes both trials and accounts that you have temporarily suspended. This overview provides you with essential information to efficiently manage your licenses and ensure a smooth operation.
And finally right at the bottom you will see an overview of your balance and transactions.
Creating Orders and Trials
Create an Order or Trial
Now, let’s walk you through the process of creating an order or a trial. The steps are the same for both.
From the Main Overview, navigate to the top left block. If you sell in different currencies, select a Price List that corresponds to the desired currency.
Click on “New License” to initiate the order creation process. This will take you to the Orders Page, where you’ll find several options to configure the order according to your customer’s requirements.
- First, you can add a purchase order number if necessary. If you have a promo code, you can also enter it to apply any applicable discounts.
- Next, select the printers and cutters you want to add to your customer’s configuration, ensuring that they align with their specific needs.
- Now, it’s time to choose the type of subscription your customer desires: Monthly SaaS, Annual SaaS, or Once-Off Perpetual License. Please note that the available options may vary based on your region.
- Additionally, select the appropriate Plan Type, such as Production or Connect, depending on the customer’s preferences and operational requirements.
Once you’ve made these selections, you have two choices: Order Now or Get a Trial. Pick the appropriate option based on your customer’s needs.
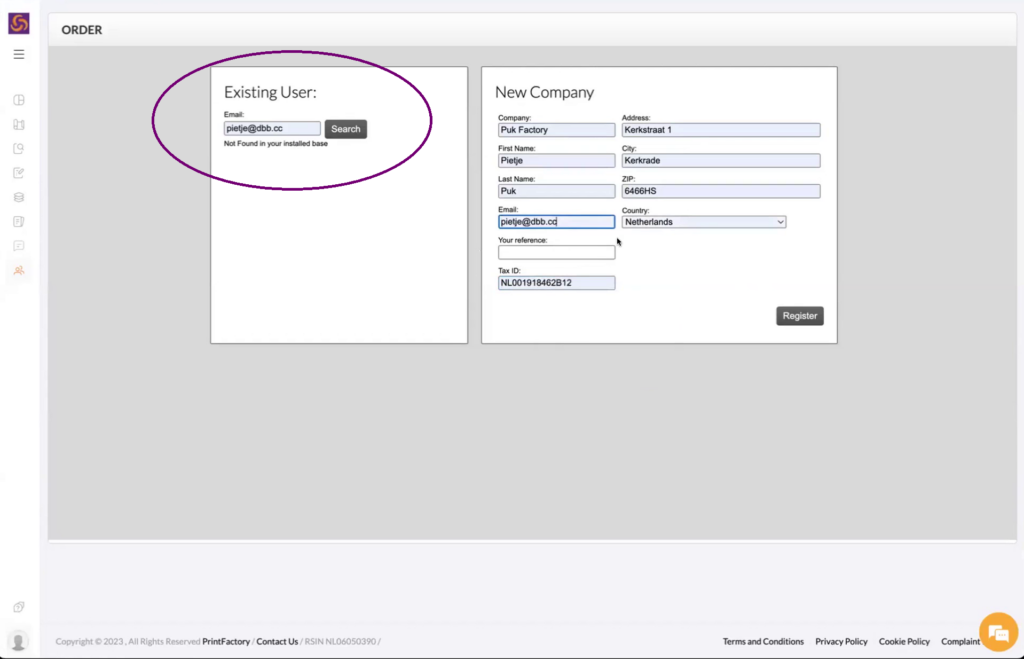
To proceed, you’ll need to register your customer’s information. There are two options available:
- Existing Customer: Enter the customer’s email address and perform a search to find their existing record, or
- New Customer: Complete all the required fields to create a new customer profile. Please note that in certain regions, a TAX/VAT ID might be necessary.
Once you’ve entered the relevant information, click “Register” to finalize the registration process.
Congratulations! Your trial or order has now been successfully created. Your customer will receive an email with instructions on how to activate their license. If needed, you can also share the following link with them: https://help.printfactory.cloud/knowledge-base/license-registration-and-online-activation/
By following these steps, you can seamlessly create orders or trials for your customers, ensuring a smooth and efficient process.
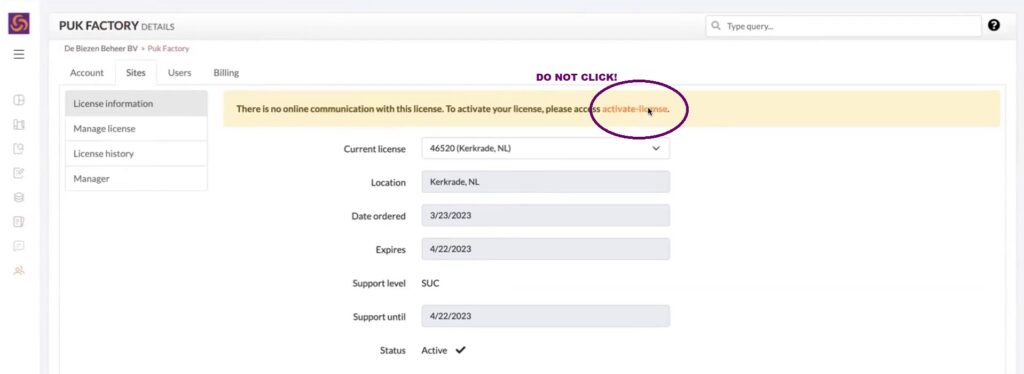
NB : Please refrain from clicking “activate-license” on this page, as it is exclusively for OEM features.

Delete an Order or Trial
Mistakes can happen!
But if you act fast you can delete an order or trial made in error!
To delete an order or trial, follow these steps:
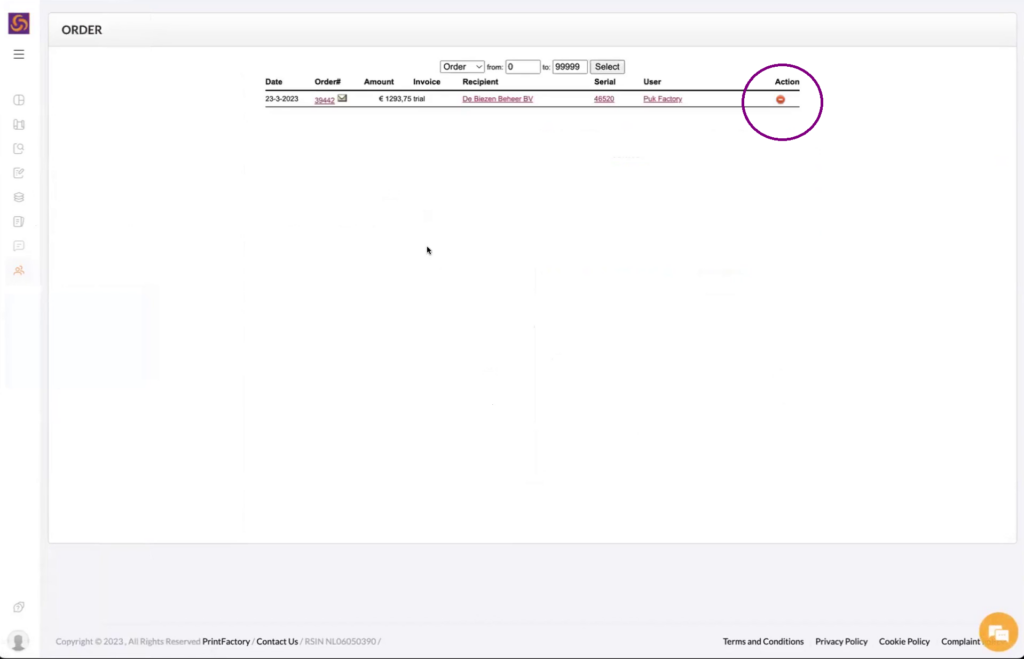
- Go to the Orders section of the App.
- Find the specific order or trial that was made in error.
- Check whether the customer has already activated their license. If the license hasn’t been activated yet, you will typically have the option to delete the order or trial.
- Look for a “no entry” icon associated with the order or trial you want to delete. Click on that icon.
- Confirm the deletion when prompted to do so. This action should remove the order or trial from your system.

NB: To avoid creating duplicate orders or trials for the same customer in the future, it is advisable to search for the customer during the registration process. This step ensures that you don’t inadvertently create multiple instances for the same customer.
Re-Adding Customer after Deleting Order or Trial
After creating an Order or Trial and reviewing all the information, you might discover an error in your setup. This could involve mistakenly placing an order instead of initiating a trial. If the customer’s license hasn’t been activated yet, you can rectify this by deleting the order. You can find the delete option by clicking the “no entry” sign in the “Orders” section.
Now, if you need to add the customer again, despite them already being in the database, you can do so efficiently. Simply return to the new Order screen and utilize the email search feature to locate the existing customer. This approach saves time as it eliminates the need to input customer details all over again.

NB : Simply return to the new Order screen and utilize the email search feature to locate the existing customer.
Dealer Order Management
As a dealer, you have full visibility and control over your customer orders through the Orders tab. Here’s what you can do:
View Orders: Access all your orders in one place. Click on a customer to see detailed site information.
Extend or Convert Trials: Use the “+” button to extend a customer’s trial period or convert it into an official order seamlessly.
Configuration Changes: Click “Configuration” to make necessary adjustments to the customer’s setup. Here, you can “swap” drivers to meet their needs. Note that switching to a higher class driver will incur a higher price.
Audit Trail: Track all changes and updates in the “Audit Trail” for complete transparency and record-keeping.
This comprehensive toolset ensures you can manage your customer accounts efficiently, providing the flexibility and oversight needed for smooth operations.
NB : Please refrain from clicking “activate-license” on this page, as it is exclusively for OEM features.

NB : Your Account Manager can show you how to add, remove and swap drivers but we cannot perform these tasks for you.
Dealer Control Features
As a dealer, you have the ability to manage your customers’ licenses effectively with our “Suspend” and “Stop” features.
Suspend: Ideal for situations such as unpaid accounts. When you suspend a license, it will become inactive at the next billing cycle. This temporary suspension can be lifted and the license reactivated once the issue is resolved.
Stop: Use this feature to immediately suspend a license. This is useful for urgent situations requiring an instant halt to the license. Like suspension, you can reactivate the license once the necessary actions are taken.
These tools ensure you have full control over your customer accounts, maintaining seamless operations and addressing any issues promptly.
Dealer Billing Portal and User Rights
As a dealer, managing your billing details is straightforward with our billing portal. Here’s how you can access and use it:
Access the Billing Portal: Click on your name in the bottom left-hand corner of the dashboard, then select “Billing”.
View Invoices: See detailed invoices, reflecting the net amount after your dealer discount.
Online Payments: Conveniently pay your invoices online directly through the portal.
Print or Download Invoices: Print or download copies of your invoices for your records.
User Rights Management: The license owner can control user rights for everyone in your organization via the “Users” tab, ensuring the right people have access to the right tools.
This user-friendly portal ensures you have full control over your billing and user management, making administrative tasks efficient and hassle-free.
Managing your Demo/NFR License
When you sign up as a dealer with an account manager, we will create a dedicated account for you. You will get a Demo license – we call this a NFR (Not for Resale) license. You will use this license to manage your account:
- Demo
- Create Orders
- Check Billing information and more
To ADD a DRIVER to a Customers site please see the help article


